Add or Remove Quick Settings in Windows 11
PC users can quickly and easily manage common PC settings like Volume, Brightness, Wi-Fi, Bluetooth, and Focus Assist via Quick Settings. When playing music or videos in Microsoft Edge or streaming music in apps like Spotify, you will be able to see the media playback controls directly above your Quick Settings. To add Quick Settings on your Windows 11 device, do the following:
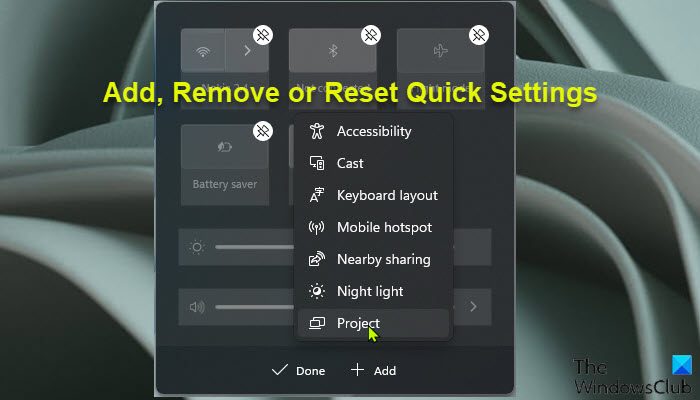
Press Windows key + A to open Quick Settings.Click on the Edit quick settings (pencil) icon.Click on Add, and click on an available setting you want to add.You can drag and drop settings to re-arrange them in Quick Settings.Click Done when finished adding settings.Repeat the steps above for each setting you want to add.
To remove Quick Settings on your Windows 11 device, do the following:
Press Windows key + A to open Quick Settings.Click on the Edit quick settings (pencil) icon.Click on Unpin button on the settings you want to remove.You can drag and drop settings to re-arrange them in Quick Settings.Click Done when finished removing settings.Repeat the steps above for each setting you want to remove.
Pencil icon missing in Windows 11 Quick Settings
If you upgraded from Windows 10 to Windows 11, this pencil icon might be missing. To restore the icon, open Registry Editor, navigate or jump to the registry key below and delete the Microsoft.QuickAction.Edit registry key on the right pane. The effect is immediate, no restart is required.
Reset Quick Settings in Windows 11
Just like you can reset Quick Actions in Action Center in Windows 10, you can reset Quick Settings in Windows 11 to default if the Edit button is missing, not opening, or you just want to restore its default settings. To reset Quick Settings on your Windows 11 device, do the following: Since this is a registry operation, it is recommended that you back up the registry or create a system restore point as necessary precautionary measures. Once done, proceed as follows:
Press Windows key + R to invoke the Run dialog.In the Run dialog box, type notepad and hit Enter to open Notepad.Copy and paste the syntax below into the text editor.
Save the file with a name and append the .bat file extension to create a batch file – eg; ResetQS.bat and on the Save as type box select All Files.Now, you can run the batch file with admin privilege (right-click the saved file and select Run as Administrator from the context menu) or simply double-click the file to run it.
That’s it on how to Add, Remove or Reset Quick Settings in Windows 11! Read: How to prevent editing Quick Settings in Windows 11 computer
Where is the Action Center in Windows 11?
To open the Action center (Quick Settings), do any of the following: On the right end of the taskbar, select the Action Center icon. Press the Windows logo key + A. On a touchscreen device, swipe in from the right edge of the screen.
How do I edit Quick Settings in Windows 11?
To edit or change notification and quick settings in Windows 11, do the following:
Select the battery, network, or volume icon to open the quick settings panel.Right-click on the quick settings panel and select Edit quick settings.Select the Add button to add a quick setting or press the pin icon to remove.
How do I fix Action Center in Windows 11?
If you notice the Action Center in Windows 11 is not opening, you can try the following fixes:
Scan system files.Restart File Explorer.Enable the Action Center with Group Policy Editor.Reregister the Action Center.Enable Action Center by editing the registry.Restore Windows 11 to a previous date.
How do I turn on Quick Access in Windows 11?
To turn on quick access for specific folders on your Windows 11 device, follow these instructions: Right-click on the folder you want to add to Quick Access and then select the Pin to Quick access option. Once done, you will then be able to access all the pinned folders from the Quick Access panel. This post will show you how to enable Simplified Quick Settings in Windows 11.

