Users can add the time limit on the access of email circulated to the recipients using the Confidential Mode. It helps to protect the information inside the email and does not allow the receiver to copy, print, download, and forward the email. The sender has the control to remove the access of the confidential email from the receiver’s inbox.
Set an Expiration Date to your Emails in Gmail
Gmail offers a feature to add an expiration date to the emails so that the ones not required later can disappear automatically making space for future emails. Bulk removal of emails once the memory offered by google is filled could be cumbersome. The user may pre-define the time limit of the emails to enjoy uninterrupted service. To add an expiration date to emails in Gmail, follow the below steps: First of all, go to gmail.com on your computer and then sign in to your Gmail account. If the information is already filled in and you need to sign in to a different account, click Use another account.
Once you’re in, click on the Compose button. Inside the compose mail window click on the Confidential Mode icon as shown in the above image.
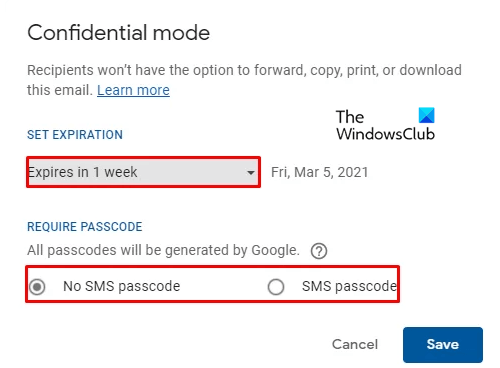
A new window will prompt on the screen with several options. set the Expiration Date and Passcode requirement. Users can choose the time of expiration from the Drop-down menu which offers 5 choices such as:
1 day,1 week,1 month,3 months &5 years.
After selection, click on the Save button. The composed mail window will display the date of expiration of the mail as specified by the user. If you want to change the date, simply click on the Edit option. Gmail offers another feature of removing access to the email before the expiration date. If the user wishes to do so then click on the Sent mail option and search the Confidential email you want to restrict the access to. Open the email and select Remove access. Now the recipients can no longer access that email. Similarly, you can also add an Expiration Date to Emails in Outlook.