How to use Transcribe feature in Word for the web
The Transcribe tool works well with recorded audio as well during an event live speaking. To use it, The feature currently supports only the English language. However, it is likely that Microsoft will add support for other languages as well. Login to your Microsoft account and open Word. Open a blank document by pressing the ‘+’ sign.
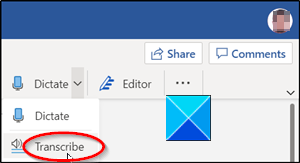
Go to the Ribbon menu and select the Dictate option. Expand the menu by clicking the drop-down arrow and select the Transcribe option.
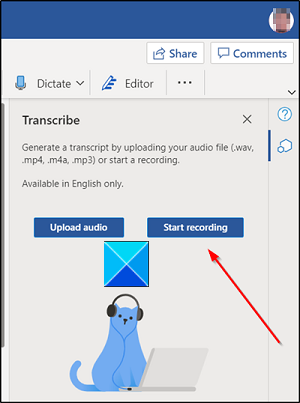
Start recording the conversation.
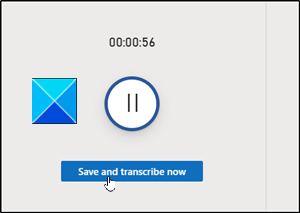
When done stop the recording and press the Save and transcribe now button.
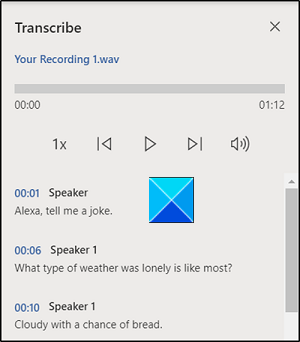
Allow the file to be uploaded to OneDrive. This may take some time.
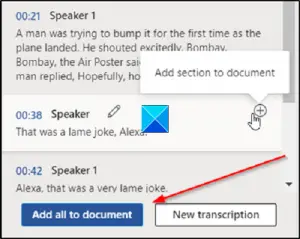
Thereafter, a sidebar will appear with your newly generated transcript in WAV format.
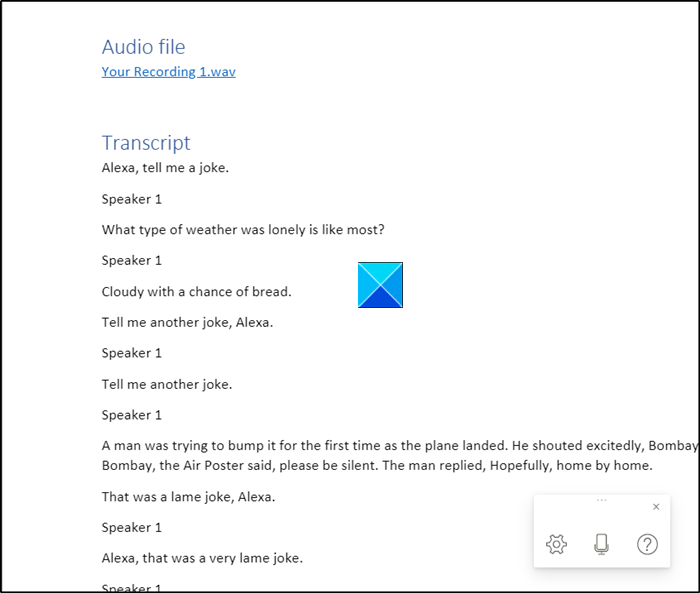
Here, you can either choose to add a selection of the transcript to the document or the entire transcript without having to type them all.
It’ll also let you pull quotes from the transcription and insert them as you please into the document using Microsoft artificial intelligence (AI) through Azure Cognitive Services. As of now, Microsoft for the web has a five hour limit per month for uploaded recordings and each uploaded recording is limited to 200 MB size limit. Read next: How to Turn off Paragraph marks in Microsoft Word.